How to Build a Concrete Ramp for Heavy-Duty Industrial Use
In the world of industrial construction, a ramp is much more than a slanted piece of pavement. It is a critical bridge between your facility and your logistics. Whether you are moving heavy equipment at a Nutrien mine site or managing high-volume grain trailers in Northern Alberta, the integrity of your concrete ramp dictates the speed and safety of your operations.
When built incorrectly, a ramp becomes a liability—cracking under pressure, causing equipment wear, or worse, becoming a safety hazard during a Saskatchewan winter. In this guide, we will walk through the professional engineering standards required to build a concrete ramp that stands the test of time.
Why Quality Matters for an Industrial Concrete Ramp
Before we dig into the “how-to,” we must understand the “why.” A residential driveway ramp might see 2,000 lbs of pressure from a sedan. An industrial concrete ramp might face 80,000 lbs or more from a fully loaded semi-truck or a piece of heavy mining machinery.
If you cut corners on the sub-base or the reinforcement, the concrete will eventually bow, shear, or “spall” (surface chipping). At Credence, we believe in doing it right the first time so you don’t have to pay for a costly demolition and re-pour five years down the road.
Step 1: Evaluating the Site and Load Requirements
The first step in building a concrete ramp isn’t pouring; it’s planning. You need to determine the “Design Load.”
- What is driving on it? Forklifts with solid tires exert different pressure than trucks with pneumatic tires.
- The Slope Ratio: For industrial use, a 1:12 slope is standard, but for heavy equipment with low ground clearance, you may need a more gradual transition to prevent “bottoming out.”
Step 2: Preparing the Sub-Base (The Foundation)
If your concrete ramp fails, it’s almost always because the ground underneath moved. In the Canadian prairies, the soil is prone to shifting with the frost.
- Excavation: You must remove all topsoil and organic matter. You need to reach stable, inorganic subsoil.
- Compaction: Use a vibratory roller to compact the soil.
- The Base Layer: Lay down 6 to 10 inches of crushed stone (¾-inch minus). This provides a stable platform and allows for drainage, which is essential for preventing frost heave.
Step 3: Forming and Reinforcement (The Skeleton)
A heavy-duty concrete ramp requires a robust internal skeleton. While some contractors use wire mesh, we highly recommend Grade 60 Rebar for any industrial application.
- Forming: Use 2×8 or 2×10 lumber, reinforced with heavy-duty stakes. Because concrete is heavy and a ramp is angled, the pressure at the “toe” (the bottom) of the ramp is immense. Your forms must be braced to prevent “blowouts.”
- Rebar Grid: Create a grid of rebar, typically spaced 12 inches apart. Use “chairs” to hold the rebar in the middle of the slab. If the rebar sits at the bottom, it does nothing to help the tension at the top.
Step 4: Selecting the Right Concrete Mix
You cannot use standard “off-the-shelf” concrete for an industrial-grade concrete ramp. You need a mix engineered for the environment.
- PSI Rating: We recommend a minimum of 4,000 to 4,500 PSI.
- Air-Entrainment: In cold climates like Saskatchewan, your mix must include 5% to 7% air-entrainment. This creates microscopic bubbles that allow moisture to expand when it freezes without cracking the concrete.
- Water-to-Cement Ratio: Keep it low. Adding too much water makes the concrete easier to pour but significantly weaker once it cures.
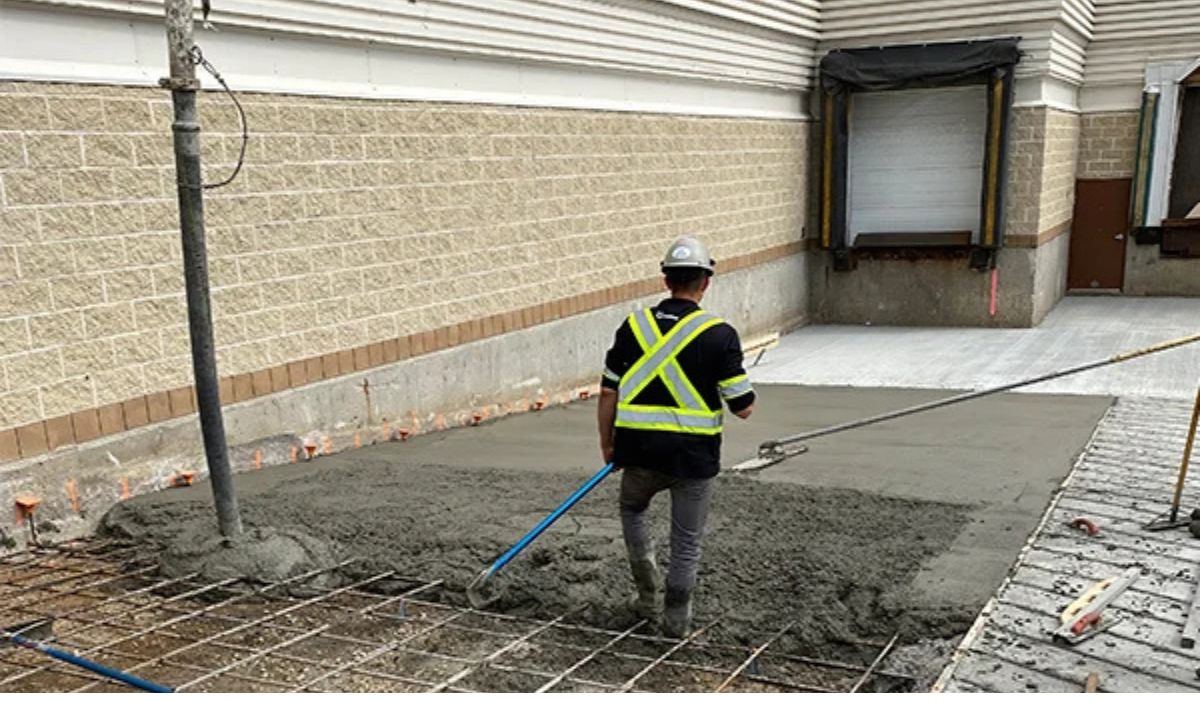
Step 5: Pouring and Managing the Transition
The trickiest part of a concrete ramp is the transition at the top and the bottom.
- The “Toe” of the Ramp: The point where the ramp meets the ground should be “keyed” into the earth or thickened to prevent the edge from chipping or curling under the weight of heavy tires.
- The Pour: Start from the bottom and work your way up. If you start at the top, gravity will cause the wet concrete to slump toward the bottom, making it impossible to keep an even thickness.
Step 6: Finishing for Safety and Traction
A smooth finish is the enemy of a safe concrete ramp. In industrial settings, spills, rain, and ice are common.
- Broom Finish: Once the concrete has started to set, use a heavy-duty construction broom to create deep grooves.
- Tining: For even better traction (especially for heavy loaders), a “tined” finish—which uses metal rakes to create deeper channels—is the gold standard.
Step 7: The Curing Process
The most common mistake is allowing a concrete ramp to dry too fast. Concrete doesn’t “dry”—it undergoes a chemical reaction called hydration.
- Curing Compounds: Apply a high-quality curing compound to seal in the moisture.
- Wait Time: Even if the concrete looks hard the next day, do not drive heavy machinery on it. It takes 7 days to reach roughly 70% of its strength and a full 28 days to reach its design strength.
Why Choose a Professional for Your Concrete Ramp?
While the steps above provide a roadmap, the reality of industrial construction is often more complex. Each site has unique drainage issues, soil types, and load requirements.
At Credence Construction Ltd, we bring decades of experience in the mining and agricultural sectors to every project. We understand the specific demands of the Canadian prairie environment. When we build a concrete ramp, we aren’t just pouring mud—we are engineering a solution that supports your business’s productivity.
Key Takeaways for a Successful Project:
- Never skip the sub-base compaction.
- Always use Grade 60 rebar on chairs.
- Ensure a high-PSI mix with air-entrainment for winter durability.
- Prioritize a high-traction finish for site safety.
Final Thoughts on Your Concrete Ramp
Investing in a high-quality concrete ramp is an investment in your facility’s future. By following these industrial standards, you ensure that your loading zones remain functional and safe for years to come.
Are you planning a facility upgrade or a new build? Contact Credence Construction today to discuss how we can help with your next industrial project, from steel fabrication to heavy-duty concrete solutions.